The Birdy Blog

Unraveling the mysteries of skin care and life in general

You Should Know

3 Tasty Smoothie Recipes for Glowing Skin

Have you ever thought about the benefits your skin gets from daily consumption of certain super foods? I developed some smoothie recipes for younger looking, glowing skin based on experience, results, research and taste. Smoothies are a great way to accomplish multiple health benefits for your skin and body.

  • They fill you up.
  • Easy way to get fruits and vegetables into your diet.
  • Replace them for a meal to keep your waistline trim without sacrificing nutrition.

Drink them 5-7 times a week for most dramatic skin care results. Important Ingredient info:

  • No added sugar! Use the sweetness from the fruit to sweeten your smoothie.
  • Choose hemp milk or almond milk instead of cow’s milk. See stats here about benefits of hemp milk vs almond milk. Choose for yourself which will benefit you more. Almond is more available and less expensive and is a good source of Vitamin E (super beneficial antioxidant for your skin.) Hemp milk has some impressive stats for skin, hair and nails but is higher in calories and sugar.
  • No cans! Use only fresh or frozen ingredients. Freeze fresh fruit if you can’t use it all up before it expires. If recipe calls for 1/2 banana freeze the other half.
  • Choose organic fruits and veggies if it’s in your budget. Especially for peaches, nectarines, all berries and spinach. This list from Web Md has great info on what to buy organic or conventional.
  • Smoothies are a great way to use up leftover foods that might eventually end up in the garbage.
  • If you make substitutions & use fresh or frozen you’ll get some nutritional benefits no matter what goes in your smoothies.

Flax vs chia seeds: Go for the Chia seeds.

  • They are a better source of omega 3 and 6.
  • Unlike flax seeds, you don’t need to crush them or process them in any way to receive health benefits.
  • They have 6 grams of fiber per serving and help “sweep” your system.
  • They are pricey but worth the benefits. So far I’ve found the best price at Costco.
  • Include them in smoothies, on top of yogurt, in muffins, on oatmeal or in salads.

Protein powders:

  • They are made from: whey, silk, hemp and other plant sources. Choose one according to your dietary restrictions.
  • For a review of Plant Fusion brand see the lifesyle blog of “A Foodie Stays Fit.” Plant Fusion is: dairy, soy, gluten and animal free.

Why include flax oil? If your smoothie replaces a meal you need the good fat:

The recipes: The Double X Smoothie AntioXidant and DetoXifying For the “glow”:

  • 1/2 cup blueberries (fresh or frozen)
  • 1/4 cup strawberries or blackberries (fresh or frozen)
  • 1 TBSP Chia Seeds
  • 1/2 Banana or 1/4 cup mango (fresh or frozen)
  • Handful of spinach or kale
  • 1 cup almond or hemp milk (unsweetened)
  • 2-3 ice cubes if using all fresh fruit
  • 2 TBSP protein powder
  • 2 tsp flaxseed oil

Orange Dream For dry or mature skin

  • 1 peeled and sectioned orange- Don’t use the thick skin between the sections as it doesn’t blend very well and leaves your smoothie not so smooth.
  • 1/4 cup orange juice
  • 1/4 avocado
  • 1/2 banana
  • 1 TBSP chia seeds
  • 2-3 ice cubes
  • 1 cup almond or hemp milk (unsweetened)
  • 2 TBSP protein powder
  • 2 teaspoons flaxseed oil

Anti-inflammatory Smoothie For acenic skin Skip all cow dairy in this smoothie!

  • 1 cup green tea or almond or hemp milk (unsweetened)
  • 1 TBSP chia seeds
  • 1/4 avocado
  • 1/2 cup frozen blueberries or cherries
  • 1/2 banana
  • 1/4 cup pineapple
  • 1 TBSP lemon juice
  • 2-3 ice cubes
  • 2 TBSP non-dairy protein powder.

For those that are acne prone here’s an article from huffpo from Dr. Mark Hyman detailing why diet and acne are so closely linked. Dust off the blender and don’t sweat it! Just blend it! We are busy people and smoothies are a quick way to multi-task when it comes to skin, nutrition and calorie control. I’ve seen the benefits of smoothies first hand for my skin and I want to hear your results! ]]>

3 Tasty Smoothie Recipes for Glowing Skin Read More »
Sun Season Survival —What You Should Know Before Stepping Out

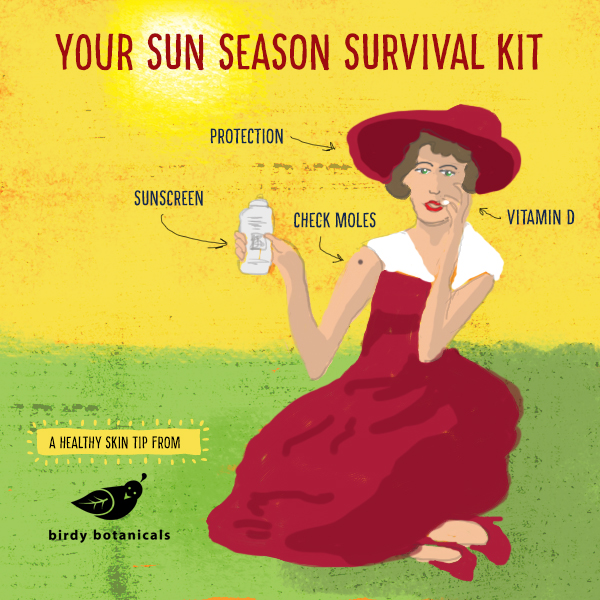
Fact: Sun exposure increases the risk of skin cancer.   Fact: Melanoma is on the rise faster than any other skin cancer. Fact: More than 90% of all skin cancers are caused by sun exposure. Fact: Three quarters of the US population has Vitamin D deficiency. Fact: Sun exposure helps us turn cholesterol into vitamin D. So, WTF? If you’re now confused and frustrated, I don’t blame you. While I may not be able to give you all the answers to the question you now have, I can at least help you make a list of questions you should be asking your doctor or dermatologist. Consult your physician:

  • How much sun exposure is safe for you to have.
  • How’s your vitamin D level?
  • Get your moles checked once a year.

Vitamin D benefits: Vitamin D is essential for strong bones but there is a plethora of diseases vitamin D deficiency can affect such as allergies, asthma, cancer and cardiovascular disease. It is true that we need Vitamin D to keep us healthy and the sun does provide us with this essential vitamin, but sun exposure can increase our risk for deadly skin cancers as well as the number 1 reason for accelerated aging of the skin. Sunscreen is only one step in protecting yourself from sun exposure. Don’t get me wrong, a certain amount of sun exposure is good for you but we tend to over do it and we also forget about the amount of exposure we get from our daily routine. Protecting yourself:

Discussing the sun exposure vs. vitamin D topic with your doctor will put these topic on his radar if it’s not already. Being proactive about your health is important as no one knows us like we know ourselves. Be good to yourself and make the call.]]>

Sun Season Survival —What You Should Know Before Stepping Out Read More »

DIY Dry Shampoo Gets you out of a Jam in a Jiffy!

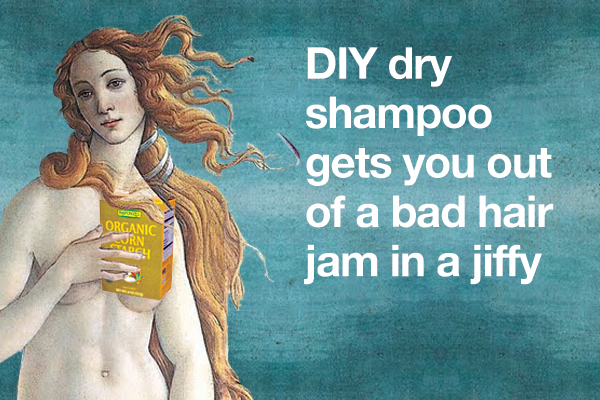
DIY dry shampoo is one of the easiest recipes you can make at home with the best results. There are times in life that you are on the go and you need some quick fixes. DIY dry shampoo is an unsung hero in the get-ready-quick category. And the brilliant thing about it is there’s lots of ingredients to choose from that will do a sufficient job. Some also say it’s better for the environment. The damage shampoo creates starts when it washes down the drain. I much prefer my handmade version over the store bought varieties that leave my hair feeling dirtier and the gunk left on my comb is a pain to wash off. Fun sucker! If you want to skip a trip to the store you probably have ingredients you can work with in your cupboard. All of these ingredients are going to work great for you but you can tweak your recipe as you get to know it and make it in a larger batch to have around. DIY dry shampoo can get you out of a jam or work into your routine. It’s great if…

Recipe suggestions using my favorite ingredients For light hair and blondes

  • 1 Tablespoon cornstarch
  • 2 Tablespoon arrowroot

For dark hair

  • 4 Tablespoons cocoa powder
  • 1 tablespoon cornstarch
  • 1 Tablespoon arrowroot

Substitutions Before substituting from the list below consider your environment and cleanup. For instance, cornmeal will give you a great shine but most of this will come out of your hair and where does it go? Does it leave a mess behind to clean up? If cornstarch and arrowroot aren’t available to you try substituting the following:

  • Baking soda
  • Rice flour
  • Cornmeal
  • Oatmeal

Containers

  • Use an old powder container and apply by shaking it
  • Use an old jar and apply with makeup brush or fingers

Skip the talcum powder I will admit, using baby powder for my DIY dry shampoo in my teenage years was a lifesaver. But these days the dangers of using talcum powder are worth considering as it’s widely known as a carcinogen. A lot of these “rumors” are often unsubstantiated by pure research but the American Cancer Society breaks it down in this report. After reading this article, in my opinion, I’d say skip it. There are lots of great substitutes out there and no reason to take the risk. How to use your dry shampoo

  • Shake onto hair or add little bits with your fingertips and tousle hair lightly with fingers to spread it around the scalp.
  • Start with small amounts and add more to repeat if needed.
  • Lift sections of hair if needed and shake more on at root of hair.
  • Let it sit for a minute and then shake it vigorously with fingers and turn your head upside-down if you need to.
  • Brush or comb out and style. If it leaves white behind keep brushing and tousling at root to pull ingredients of your scalp.

If the ingredients aren’t on your shelf you can find them all at the grocery store. For the best price per pound check out your local natural food store—they may have it in bulk. Have fun experimenting with your DIY dry shampoo recipe. If you have any ingredients you love then please let me know. I’ll always give you the credit! ]]>


DIY Dry Shampoo Gets you out of a Jam in a Jiffy! Read More »

New Lotion Recipe! More Hydrating, Great Absorption

“If it ain’t broke don’t fix it.” I took a product I’m really proud of and that has a following and tinkered with it. Why you ask? “Why mess with a good thing?” I thought it was a great recipe. But I thought it could be better. “Nothing ventured, nothing gained.” Sometimes you just have to take a leap and trust your instincts. I’m glad I did…. Birdy Botanicals would like to introduce our new 3-in-1 Antioxidant Lotion! Exciting changes to recipe:

  • New recipe qualifies for the Whole foods premium grade ingredients list.
  • Same great absorbtion. No greasy ickiness.
  • New light formula spreads faster and easier meaning you use less and spend less time applying to face and body.
  • Includes humectants (meaning retains more moisture to the skin) like glycerine and powerful glycosaminoglycans that maintain and support collagen and elastin.
  • Now contains phosopholipids that improve plumpness, hydration and smoothness of the skin.
  • Pomegranate Sterols that hold more then double their weight in water meaning more hydration. This amazing pomegranate ingredient has the same properties as lanolin and petrolatum but without using an highly allergenic animal product or a synthetic ingredient that can clog pores.

Still has amazing ingredients like:

  • Jojoba – best oil available for moisturizing without clogging pores.
  • Avocado– high in antioxidants and omega-3 fatty acids. Great for all skin types including sun damaged and mature.
  • Sunflower oils– Contains high amount of Vitamin A that helps hyper- pigmentation and make skin less sensitive to the sun.)Not to be confused with Retin-A – a form of Vitamin A that can be drying and make you more sensitive to the sun.
  • Vitamin C ester– Oil based Vitamin C that penetrates better than water based Vitamin C’s that dissipate before absorbing into skin. Vitamin C is known to boost the immune system of the skin and is a major antioxidant helping reduce the effects of free radicals
  • Plant extracts like pomegranate and ginger– serious antioxidants extracts that help fight free radicals from environmental and sun exposure.
  • Licorice helps even appearance of skin tone and lighten skin helping with hyper pigmentation (dark spots) and is gentle on sensitive skin.

Still available in 3 amazing scents!

So, “Out with the old in with the new!”]]>

New Lotion Recipe! More Hydrating, Great Absorption Read More »

DIY for Dry Winter Skin — Hands and Feet

Whether you’re on the East coast experiencing horrendous snow (sorry!) or in California dealing with the drought, winter skin creeps up on us regardless of what the weather is doing. If your not battling snow you’re constantly washing your hands trying to keep healthy while everyone around you has picked up the latest bug. Dehydrated, dry skin is no bueno. First, a couple of key tips:

  • Make sure to keep hydrated. Drinking lots of water is key to combat the drying heaters and cold, moisture-sucking weather.
  • Keep your showers short. I know, it’s not easy this time of year, but if you’re in California we should be conserving water anyway. Do your skin and the environment a favor and keep your shower short and to the point. Hot water will dehydrate and take moisture from your skin and hair.
  • Arm yourself with a couple of key products to help retain the moisture in your skin.

Sally’s Quick, DIY Super-Moisturizing Trick for Hands and Feet:

  • Rub a layer of Birdy Botanicals Butter Balm all over your hands and rub them together to evenly distribute the moisture.
  • Next, use a dime-size amount or less of 3-in-1 Antioxidant Lotion and rub into hands. This will absorb very quickly if you don’t use too much.
  • For a more intensive treatment use a super thick layer of Butter Balm and put socks on your hands for 5-10 minutes or overnight to let soak in.

Repeat as often as necessary throughout the season and go about your business. (Though, it]s not easi tiping wi@th socks on yoour hamds.)]]>

DIY for Dry Winter Skin — Hands and Feet Read More »

4 Steps to Beat the Flu Without Beating Up Your Hands

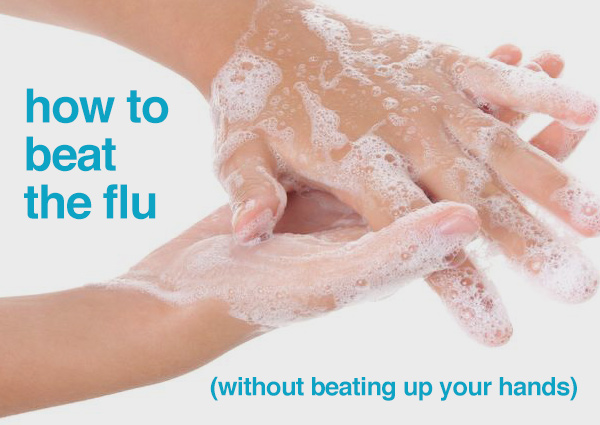
The cold and flu season is here. How will you protect yourself? The Golden rule is wash, wash, wash! We know we need to keep our hands clean and germ free but how do we care for them after all that wear and tear? Our hands are constantly exposed to the environment, sun and subject to harsh treatment. They often give away our true age. Help! 4 steps to properly clean and maintain younger looking hands STEP 1 Proper hand washing is key. To keep your hands free of the nasties, wash with soap and water after:

  • Taking public transportation.
  • Using public or private restrooms.
  • Using elevators or touching public doors and door knobs.
  • Coming into contact with with children or someone who is ill.
  • Before and after working with food.
  • When preparing food or caring for wounds use a nail brush to clean under nails

How to properly clean your hands according to the Mayo Clinic:

  • Wet hands using warm water and apply soap.
  • Use regular bar or liquid soap. The Mayo Clinic suggests avoiding antibacterial soap.
  • Rub hands together for at least 15-20 seconds.
  • Rinse thoroughly with warm water.
  • Dry completely. Avoid cloth towels as they collect germs and bacteria. If in a public place use a single use paper towel and use the paper towel to open the door.

Notes about hand sanitizers:

  • The WebMD says they kill bacteria and viruses.
  • They should never replace washing with soap and water unless there is no water available. They are only an effective additional tool to hand washing.
  • They should be alcohol based. According to a CNN report, avoid ingredient “triclosan” as it may be toxic after continued use.

So your hands are clean, what now? STEP 2 Time to moisturize but, only if you are not handling food or caring for wounds. Apply a good lotion that has ingredients like Vitamin C ester and glycerin. The Vitamin C ester will help reduce the appearance of age spots and the glycerin will help retain moisture. Use after every hand washing. For extra dry hands or in super cold weather you may need to reach for something stronger. Choose a balm that has ingredients like Shea Butter or coconut oil and Vitamin E. The Vitamin E will help repair damage from the cold and exposure to water, the shea butter and coconut oil will keep your skin moisturize and help retain water. For chapping or cracking skin, use your lotion first to replenish the water and when absorbed follow up with a thick layer of balm. Wrap hands with socks and let sit until absorbed. STEP 3 Don’t forget the Anti-aging! Don’t be afraid to use your anti-aging face serums on the back of your hands. These are your best defense against keeping skin tone even and reducing the papery look hands develop as we age. STEP 4 Apply sunscreen Our hands are always out there exposed to the elements just like our face. Show them some love and apply sunscreen whenever applying it to your face.]]>

4 Steps to Beat the Flu Without Beating Up Your Hands Read More »

Fast Fix For Ghoulish Scary Morning Face

Make it all better with one simple step. Seriously. I’m sure you’ve been there. I know I have. You wake up, stumble to the mirror and “Gah!” How do you make the scary face go away?! What to do with the puffy eyes and the dry, dehydrated pallor? 3-in-1 Hydrating Lotion Jelly to the rescue! Apply Lotion Jelly as a masque in a thick layer and let it set. Leave on for 5 minutes or as long as you’d like. Go about your business and when you hop in the shower, rinse. Yup. It’s that simple. Lotion Jelly will hydrate, reduce the appearance of fine lines and de-puff the unsightly eye bags that gives away all indiscretions from the night before. It can undo a multitude of sins. Made with aloe vera, cucumber and a touch of cranberry oil, it’s jelly-like consistency makes for a simple, easy to apply masque. It’s a life saver! 3-in-1 Hydrating Lotion Jelly is a major “Work horse”:

  • Use it as a masque for your every morning routine if you cleanse your face at night.
  • Perfect for extra sensitive skin.
  • No synthetic fragrance.
  • It’s also a light face, body and hand moisturizer.
  • Soothes skin after too much sun, wind or after shaving.
  • Keep it in the fridge and apply cold for extra de-puffing.
  • Use immediately before any event to look your best.
  • Best seller for men and women alike.

Fast Fix For Ghoulish Scary Morning Face Read More »

DIY Body Scrub- Banish the Oily Shower Shmutz!

Curse the oily body scrubs! Nothing puts a bee in my bonnet faster than tossing old, unused products in the garbage. Buying product that doesn’t work is bad for the budget. One of my product pet peeves as well as a clutter offender is those super-trendy sugar or salt body scrubs packed with loads of oil. I’m not saying they don’t do the trick but who wants to clean up a bathtub or shower that’s completely covered in grease? It’s a safety hazard and a pain-in-the-ass. So there’s another product that will sit in my cabinet unused. Lesson learned and now my blood pressure is up. A friend of mine had a simple solution for my scrub dilemma. She spent some years in Japan and claimed the Japanese women use a mixture of honey and salt to scrub their bodies. The salt exfoliated and the honey left their skin soft and supple. This is an easy and economical beauty regimen with ingredients from you have on hand in your cupboard. And, it works! Salt and Honey Exfoliating Scrub: Start with 1/2 cup of salt or sugar and get yourself a honey bear for the shower. The nozzle on the honey bear will help keep the honey under control. Microwave it first for 10-15 seconds to get it to flow nicely but don’t make it too hot or it will burn your skin! Or let it warm up in the shower stream to get it flowing. Put the honey in your hand with a handful of salt and start scrubbing. Repeat this until you have scrubbed all your parts. This is for the body only, never use this on your face. Once you are pretty and pink, rinse off. Always moisturize after any type of body treatment. My 3-in-1 Antioxidant Lotion with lavender and white tea is a great choice, if I do say so myself. Voila! No mess to clean up, no bees in the bonnet. Birdy loves bees, just not in her hat.]]>

DIY Body Scrub- Banish the Oily Shower Shmutz! Read More »

Troubleshooting your Sensitive Skin- It Doesn't Have to Hurt

Does your skin ever itch, get hives, have eczema, psoriasis, rosacea, prone to break out, easily irritated, redness, sting, tingle, burn, react to products you apply, or do you have a compromised skin barrier due to genetics or over-exfoliation and skin treatments? Or maybe you have allergies or a skin condition or have Uncle Bob’s ruddy complexion after he has a glass of whiskey. Then, my friend, you have sensitive skin. “Sensitive skin” is a ginormous umbrella that encases multiple skin grievances. There is no magic pill that can cure your sensitive skin issues. Troubleshooting sensitive skin all depends on what you’re sensitive to. There is no true hypo-allergenic ingredient. There is no one set of products or skin care routines that will benefit everyone. But hope is not lost. Recommendations for sensitive skin:Consult with skin care professionals and seek the advice of both dermatologists and licensed estheticians. They may prescribe different routes to help you with your problem and it’s important to educate yourself and stay informed about your condition. • Always use a patch test when trying a new product.If your patch test is clear, slowly work your way into using the product with regularity. If it’s a product for everyday use start with 2–3 times a week and work it slowly into your daily routine. • Always use tepid water and avoid the extremes.Keep your skin well moisturized and don’t allow it to dry out too severely. Guidelines for choosing products:Avoid irritants like scrubs made from shells, bar soaps, astringents and use all exfoliates with extreme caution. • Avoid common skin allergens like imidazolidinyl urea, quaternium 15, preservative Methylisothiazolinone, fragrances and dyes. • Avoid sulfates, propylene glycol, ascorbic acid, retinol and possibly most essential oils. Especially ones like cinnamon, peppermint, geranium, sandalwood, bergamot and clove.Beware of baby wipes and make-up removing cloths and check ingredients before using. Dealing with sensitive skin takes a lot of trial and error. If you’re lucky enough to be able to identify your sensitivities, you’re one huge step closer to fixing the problem. You can find solutions to your issues most of the time if you’re willing to spend the time. And finally, find a company that will either send you samples or give you a money back guarantee. Sensitive skin may be a pain in the ass, pun intended, but there are companies out their who care and want to help you find the product that works for you. ]]>

Troubleshooting your Sensitive Skin- It Doesn't Have to Hurt Read More »

Hydrogen Peroxide is No Longer a "Go-to" for Wound Care- Do Not Put it on Your Skin. Ever.

Since it’s still summer and the season of play, I look back on the minor cuts and scrapes I experienced while adventuring in the outside world. There are some surprising new facts about minor wound care and some updates on how to get the best results. Treating minor wounds properly is vital for the health and look of your skin. Even minor wounds can create scars that last for years if not for the length of your lifetime. In the past Hydrogen Peroxide was always the “go-to” whenever sterilizing a minor cut and also an ingredient I’ve used over and over again on myself. I was shocked to find out that Hydrogen Peroxide was no longer recommended for wound care and that it actually damages healthy skin cells. Wha? Grandma was wrong? Studies have shown that using hydrogen peroxide on wounds can actually slow the healing process by oxygenating the skin cells and causing free radical damage. It can damage healthy cells and not only increase wound healing time but can increase the chance of scarring. Increase scarring! No bueno.

  • Don’t EVER put it on your skin.
  • Put it on an open wound- major or minor
  • Swish it in your mouth.
  • Swallow it
  • Use it for any other bodily remedies that I don’t want to know about.
  • Beware of blog and pinterest DIY beauty treatments using hydrogen peroxide. (I’ve personally deleted all of mine from my boards.)

So how do we treat minor wounds? I checked the WebMD for minor cuts and scrapes. It’s best to clean wounds by running them under clean water and covering them with a sterile cloth. Hydrogen peroxide is great if you want your counters to be clean but if you can help it, I would keep it from touching your skin entirely. Source: Plastic and Reconstructive Surgery, September 2001, pages 675–687.

Hydrogen Peroxide is No Longer a "Go-to" for Wound Care- Do Not Put it on Your Skin. Ever. Read More »

Scroll to Top